Instructions on how to setup your print code for the Xerox printers on campus.
How to save a preset to remember your print code ^
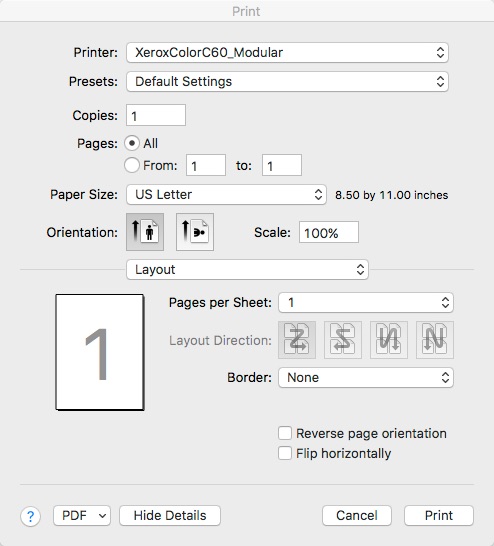
- Open a document and click File and then Print
- Select the Xerox printer you want to configure
- Click on Layout dropdown and select Xerox Features
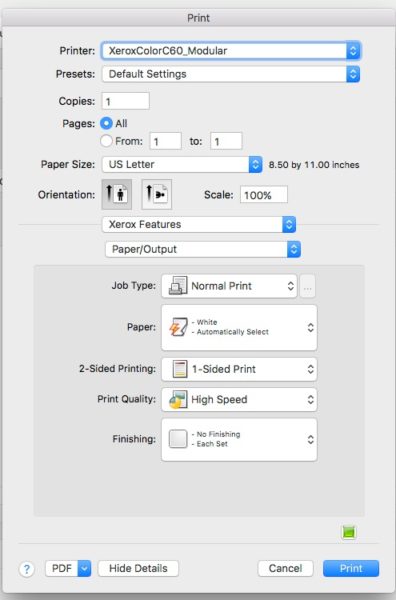
- Select the next dropdown Paper/Output and select Advanced

- Click on Accounting… button
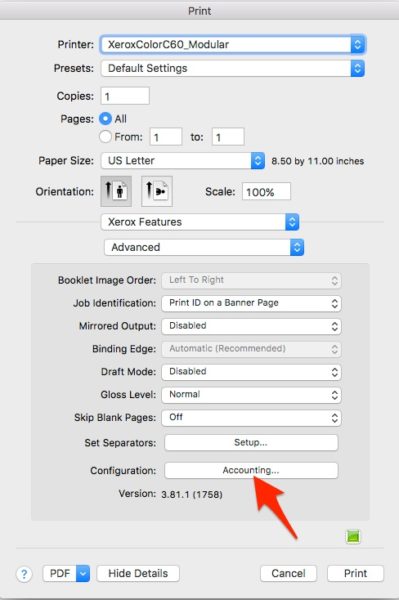
- From here click on the drop down and select Xerox Network Accounting.
- For the Default User ID and Default Account ID input the 4 digit code assigned to you.
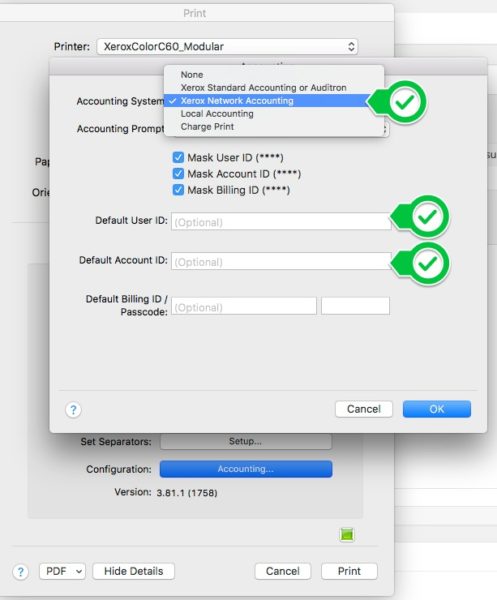
- Press OK
- Save this change as a preset, click Presets: and then Save Current Settings as Preset…
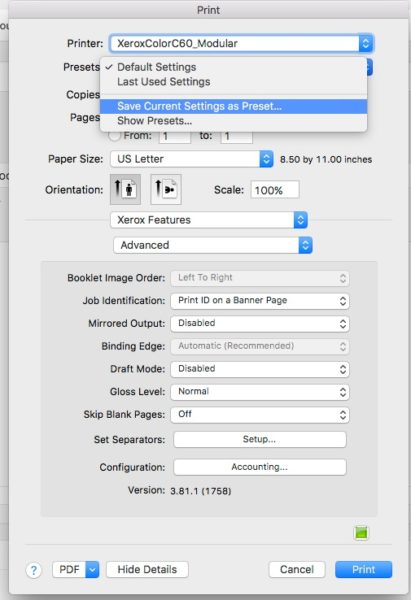
- Change the name of the saved preset to something indicating the 4 digit code is saved

- Name the preset something like “Default Settings-with pin code”

- Make sure this preset is selected, it should now become the new default preset

- Press Print and the new preset will be used to print the document using the new pin.
0 visitors found that helpful.